Learn to Play pCorder
Picked up a pCorder? You lucky thing!
The recorder is a great way to experience making music for the first time. Let’s look at the basics to take you from unboxing your pCorder to performing like a pro!
Hear pCorder in action!
Getting started with pCorder
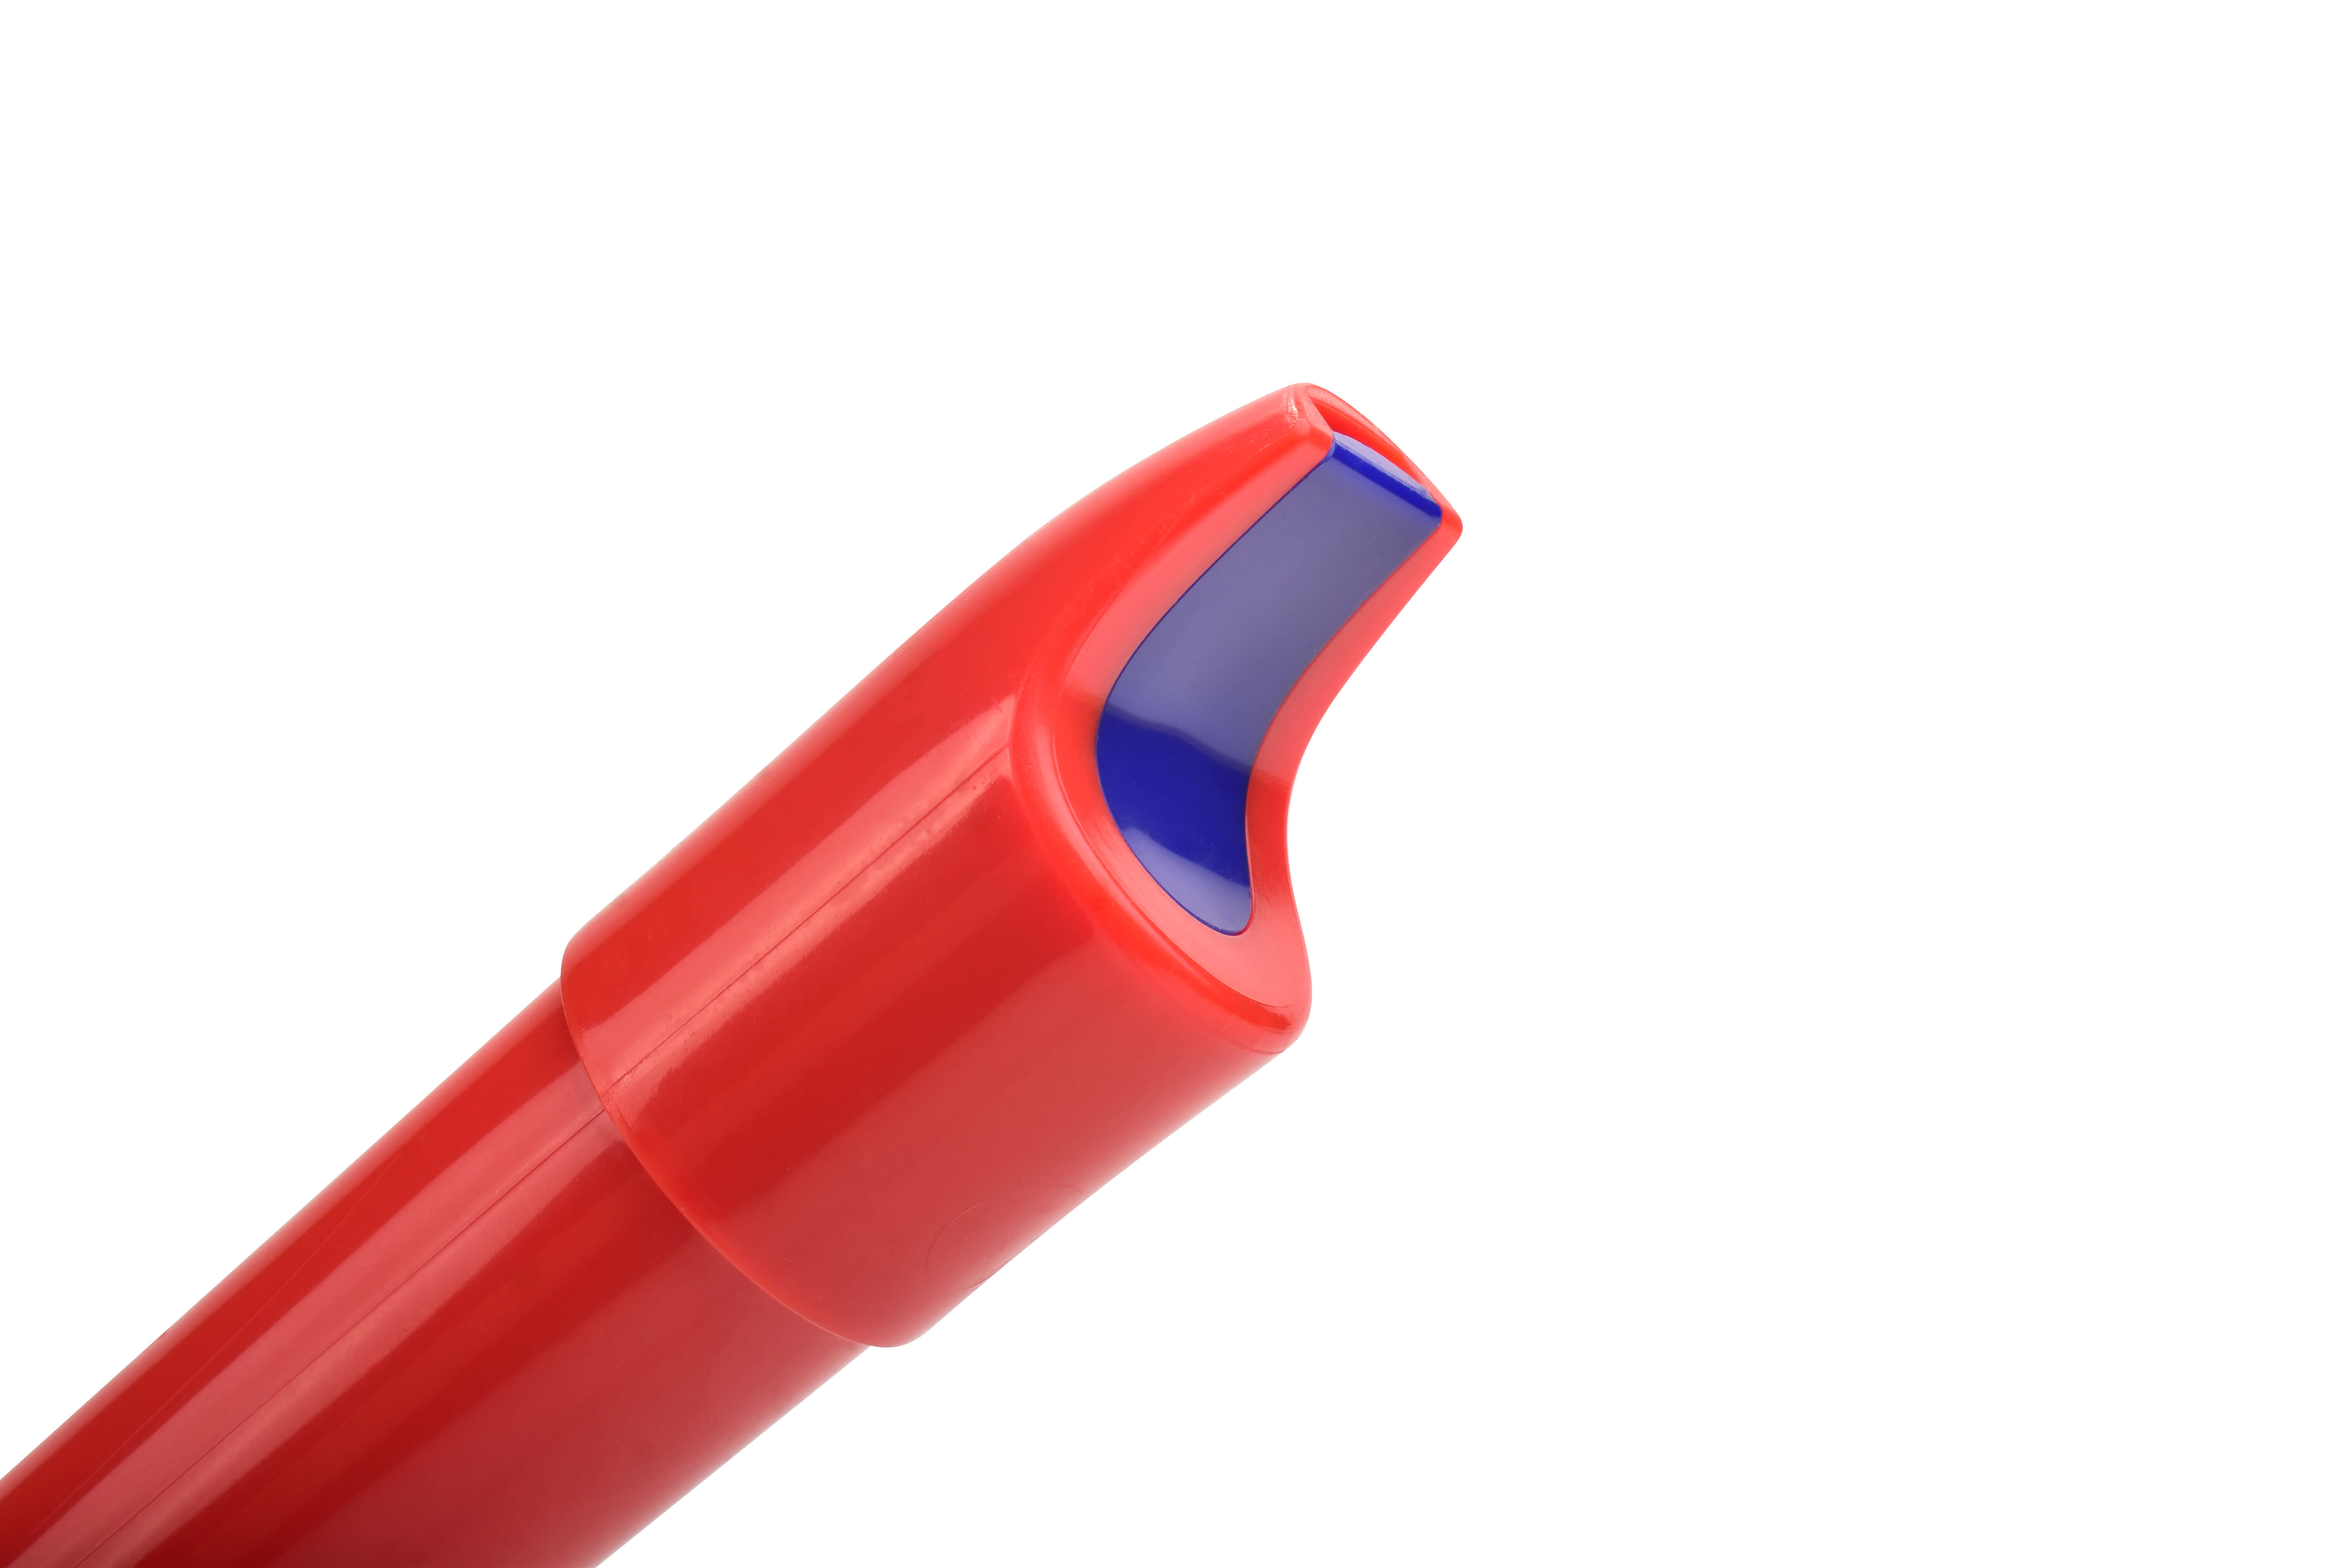
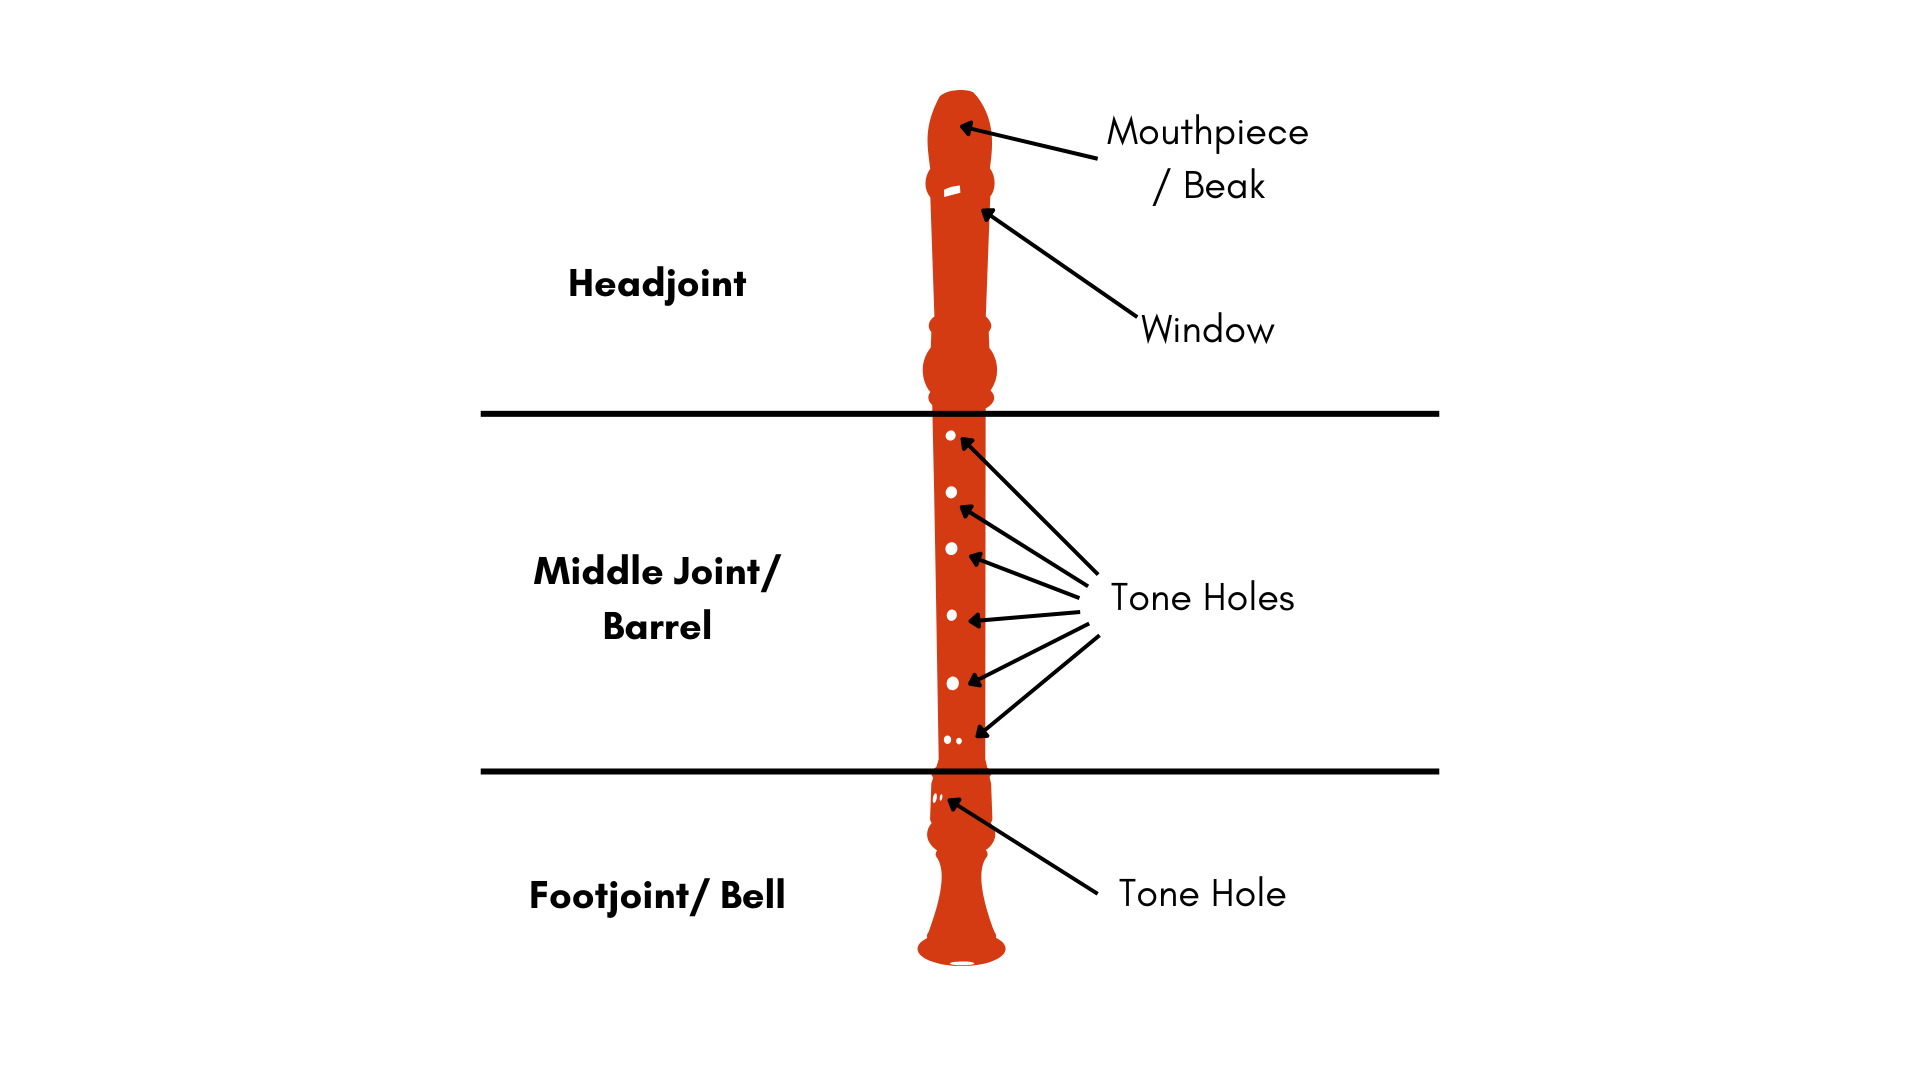
Your pCorder is made up of three parts. The headjoint is the top section, with the mouthpiece at the end. The middle joint or barrel of pCorder is where you will find most of the tone holes. The third part is the footjoint or bell, which has a double tone hole.
- Take your headjoint and twist it gently to fit into the middle joint. The window on the headjoint should be on the front of the pCorder, the same side as the middle joint with most of the tone holes.
- Add the footjoint to the bottom of your pCorder, making sure the double tone hole is on the front.
- And that’s it! Your pCorder is ready, steady to blow!
How to hold pCorder
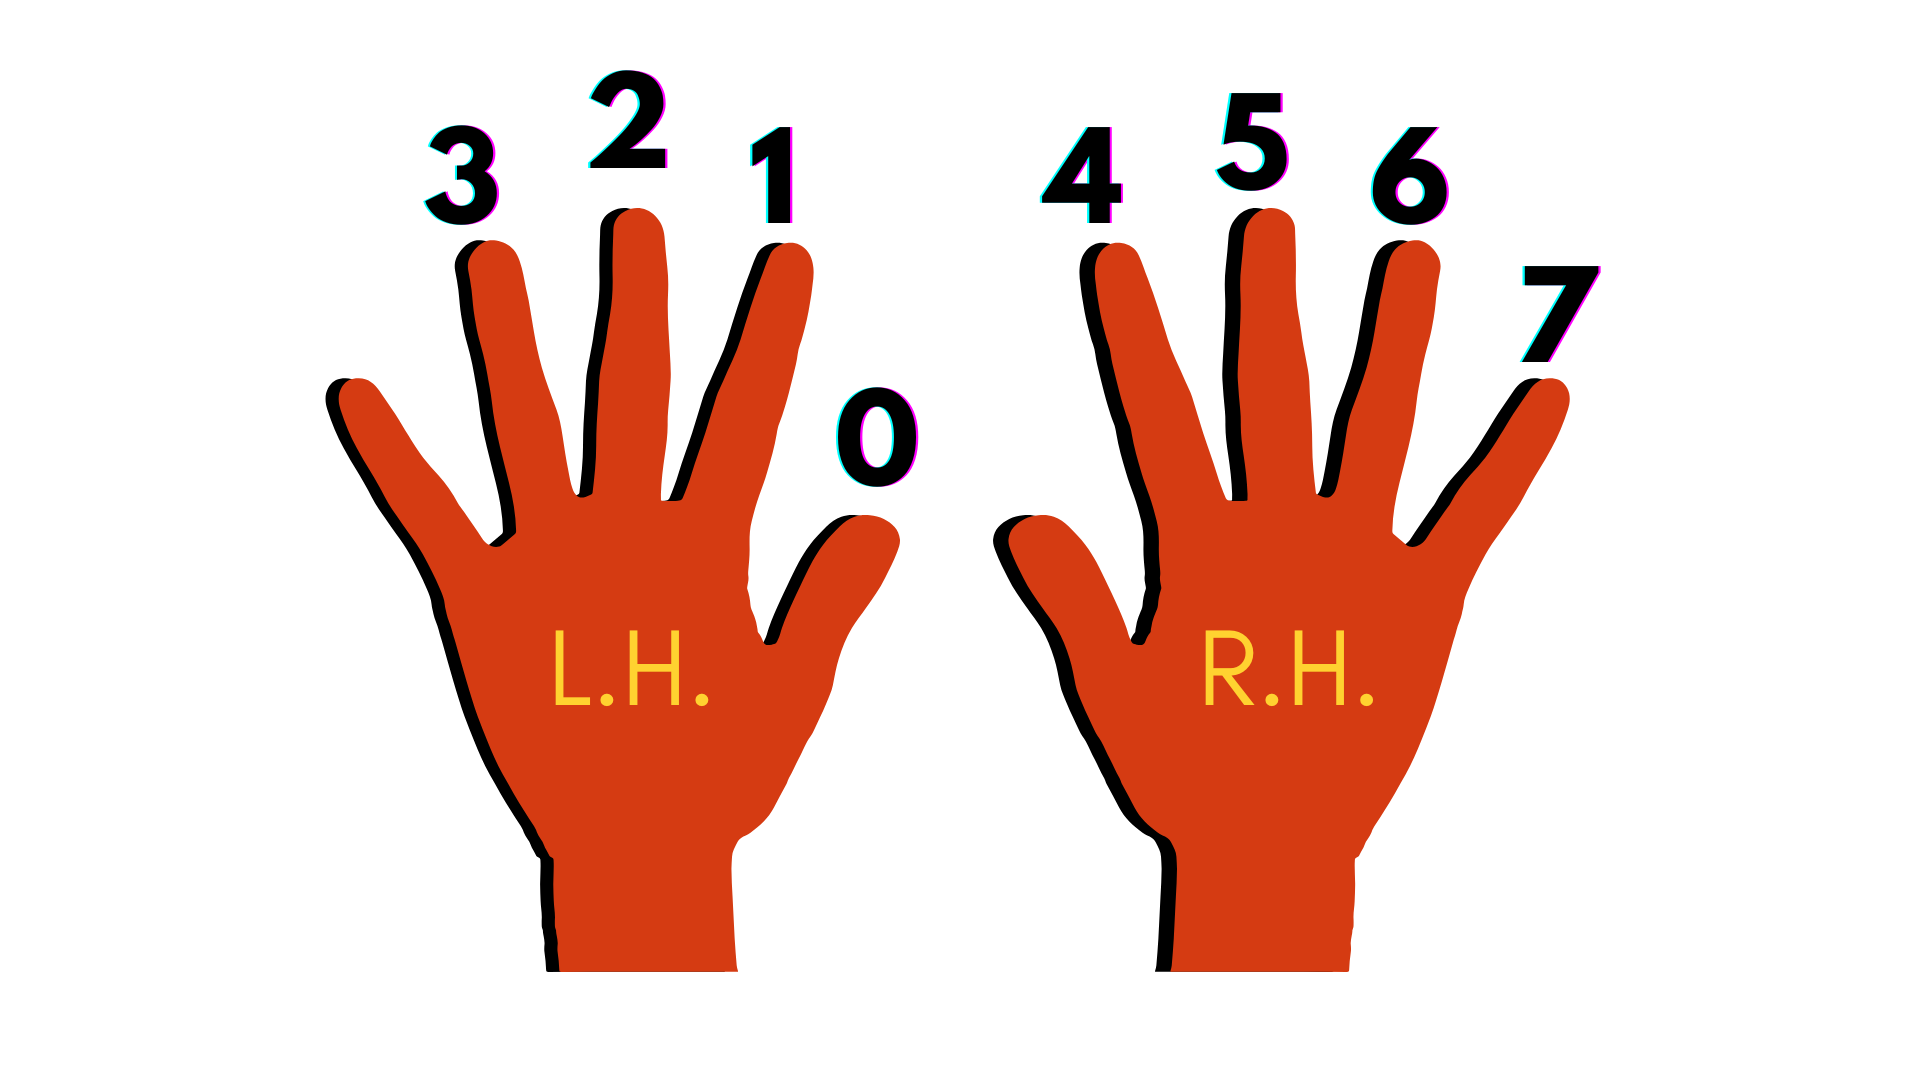
The tone holes on your pCorder all correspond to a finger on your hands. Whichever is your dominant hand, the left hand will be the top hand when you hold and play pCorder.
With your hands palm side down, we can assign numbers that correspond to the tone holes.
-
You can see that on the left hand, the ring finger is three, the middle finger is two, the index finger is one, and the thumb is zero.
-
Which one is zero you might ask? That’s the single tone hole on the back of your pCorder! And what about your left pinky finger? We won’t be using that to cover a tone hole, so it doesn’t have a number.
-
On the right hand, the thumb is not used for a tone hole so it doesn’t have a number. The index finger is four, the middle finger is five, the ring finger is six and the right pinky finger is seven.
-
Does that sound like a lot of numbers? It’s easier when you pick up your pCorder. With your left hand as the top hand, your thumb will cover the tone hole on the back (0), and your first three fingers covering the top front three tone holes (1-3).
-
Your four right fingers will cover the remaining tone holes, with your right thumb placed on the back of the pCorder behind tone holes four or five.
-
When your fingers are in place over the tone holes, they don’t need to move around. We make different notes by covering and uncovering the tone holes, but that will come later.
-
Getting comfortable with this position is the first step to playing pCorder.
Perfect posture!
Now that the hands are taken care of, we need to think about good posture. Getting into good habits now will make getting to grips with your new instrument much easier and set you up for success!
-
If you are standing while playing the pCorder, your feet should be shoulder-width apart.
-
If you are seated, plant your feet firmly on the ground in front of you.
-
Whether standing or sitting, your back and neck should be straight, with relaxed shoulders. Your chin should be level with the ground.
-
With your fingers on pCorder all set and hands balanced, make sure to relax your elbows away from the body. Your wrists should be straight.
-
To maintain balance with the pCorder in your hands, make sure that the right thumb is tucked behind tone holes four and five.

Let’s make some sounds!
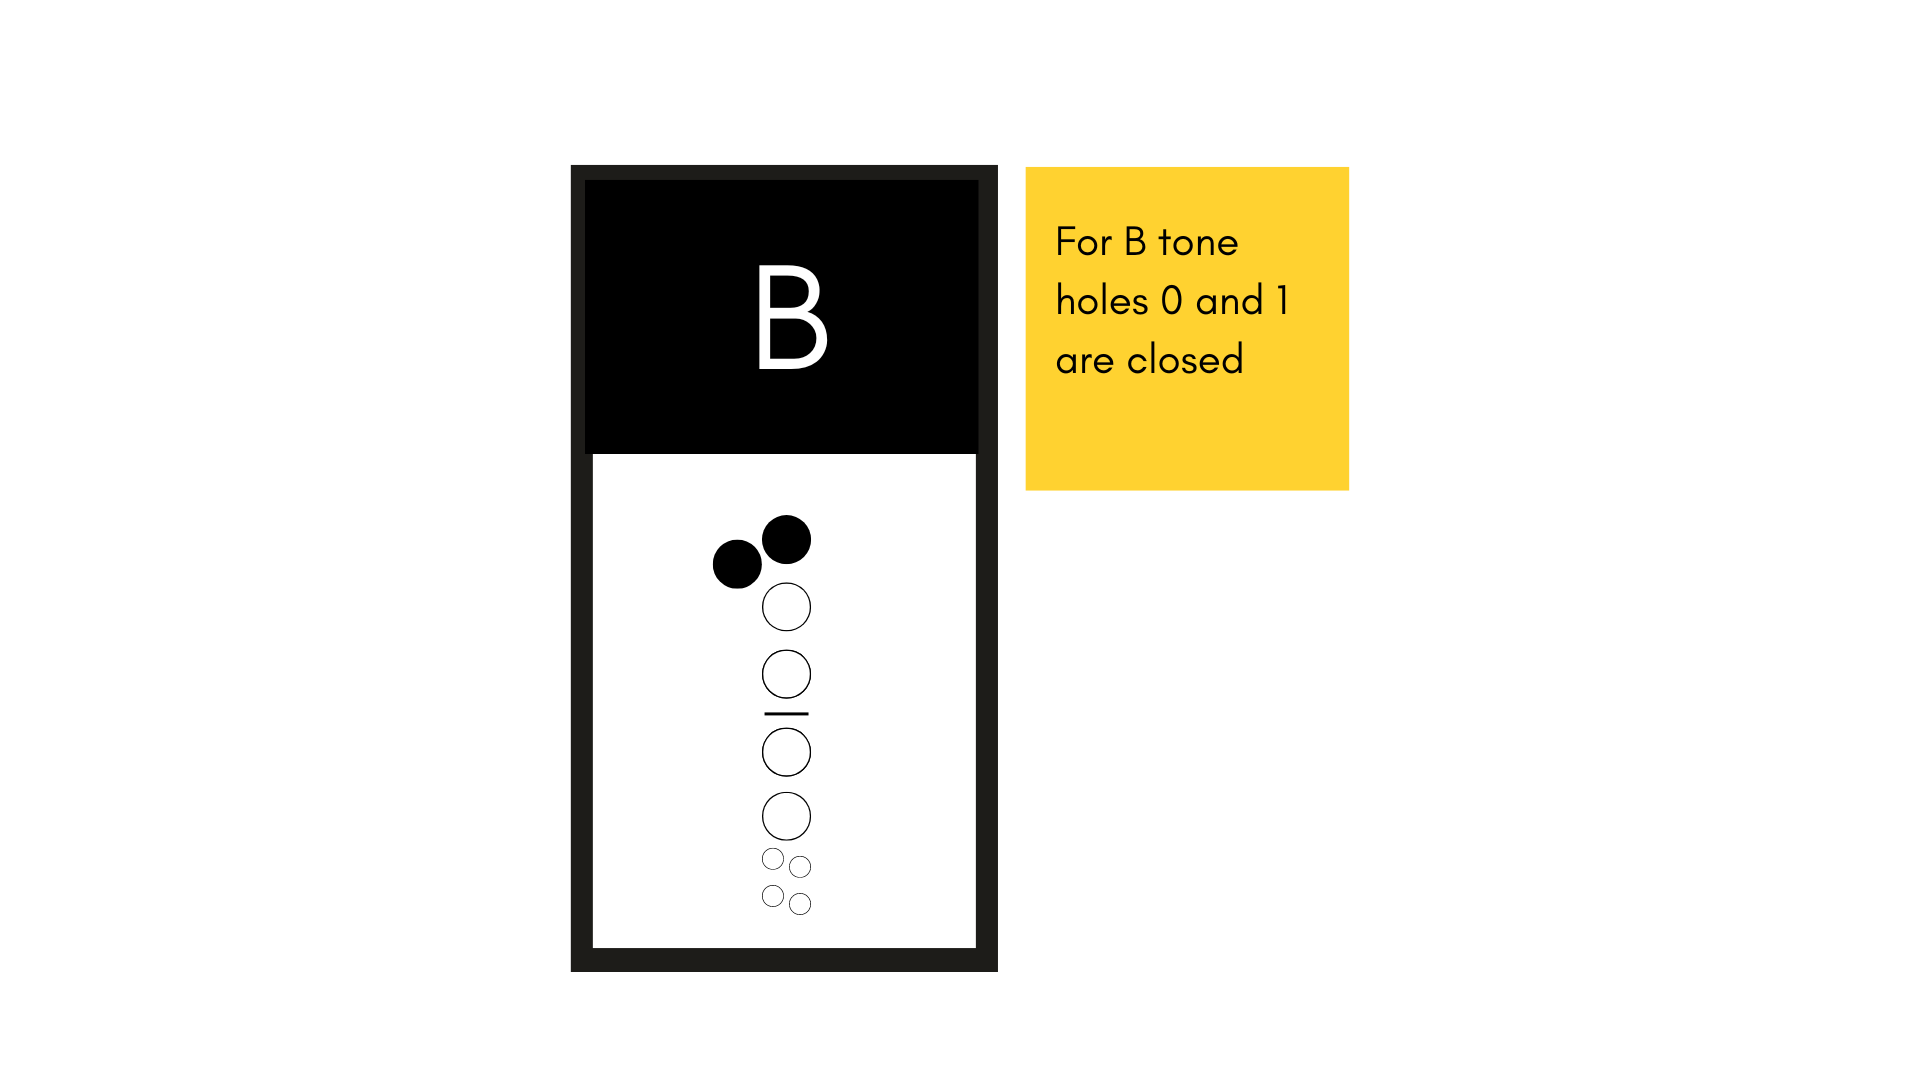
With your fingers in position and the correct posture, we are going to place the left thumb over the back tone hole (0) and your left index finger on the very top tone hole on the front of the pCorder (1).
To help us work out where to put our fingers, we used fingering charts. The holes that are filled are closed by our fingers. This is the chart for a B note.
- With your fingers in position and the correct posture, we are going to place the left thumb over the back tone hole (0) and your left index finger on the very top tone hole on the front of the pCorder (1).
- To keep your pCorder balanced, you may use your right thumb on the back around where tone holes four and five would be, but your fingers should not be covering the holes, except 0 and 1.
- When your fingers are ready, place the beak of the reorder between your lips, creating a gentle seal. Make sure that your teeth are not touching the pCorder! The pCorder should be held at a 45 degree angle from the body.
- Remember those breathing techniques? Let’s put them to use! Slowly breathe in from the diaphragm, and exhale gently into the pCorder. A steady, smooth sound is what we are listening out for.
If there is no sound, try blowing ever so slightly harder or faster.
If the sound is sharp and high-pitched, then you are breathing too hard or too fast.
Care and Maintenance
pCorder requires much less maintenance than a traditional wooden recorder.
With extended use, you may want to keep the joints between the parts lightly greased.
You can also wash out the separate parts with some soapy lukewarm water to keep your pCorder sparkling clean.
Don't forget that pCorder is constructed from an anti-microbial material to keep as many of those nasty germs at bay as possible!